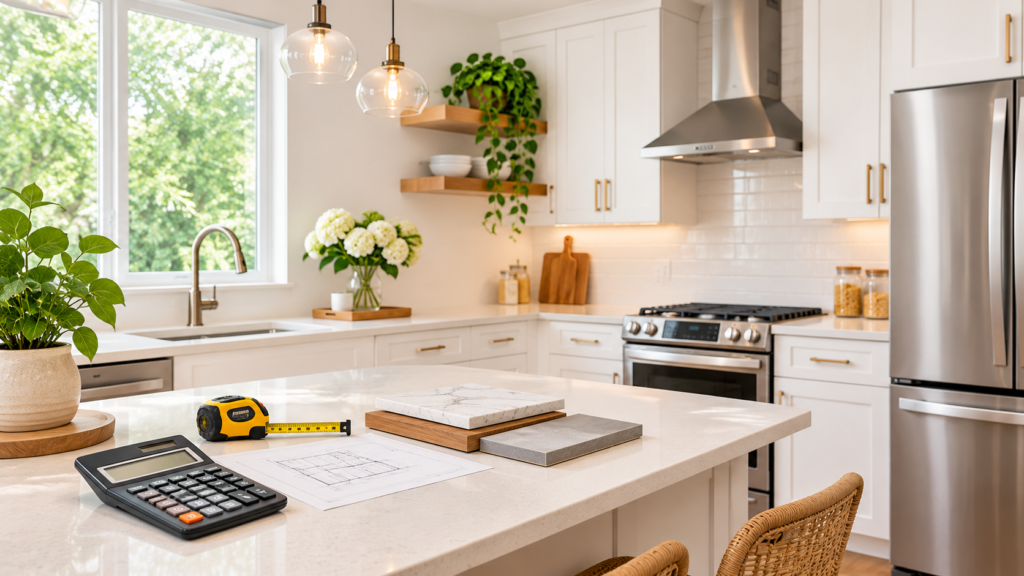
A successful kitchen remodel starts long before demolition begins. You need to establish a realistic budget, measure the available space, choose a functional layout, compare materials, finalize appliances and coordinate contractors before construction starts.
Without a clear plan, homeowners can face unexpected expenses, delayed material deliveries, poor design decisions and costly changes during installation.
This kitchen remodeling checklist walks you through the entire process, from identifying what your kitchen needs to completing the final inspection. Follow the steps in order, keep track of your decisions and use the checklist at the end to make sure nothing important is overlooked.
Quick Kitchen Remodeling Checklist
If you are just getting started, use this overview to understand the main stages of a kitchen renovation.
- Define your remodeling goals and priorities.
- Establish a realistic kitchen remodeling budget.
- Measure your existing kitchen.
- Choose a practical kitchen layout.
- Plan cabinets and storage.
- Select countertops, flooring and backsplash materials.
- Choose appliances, sinks and faucets.
- Plan lighting, plumbing and electrical requirements.
- Research contractors and obtain written estimates.
- Check permits and local building requirements.
- Finalize designs and order materials.
- Prepare your home for construction.
- Monitor installation and construction work.
- Complete the final inspection and resolve unfinished work.
The following sections explain what to do at each stage and why it matters.
1. Define Your Kitchen Remodeling Goals
Before choosing cabinets, countertops or appliances, identify what you want to improve. A kitchen remodel should solve existing problems rather than simply replace everything with newer products.
Start by evaluating how your household currently uses the kitchen.
Ask yourself:
- Is there enough countertop space for food preparation?
- Do you have sufficient cabinet and pantry storage?
- Is the current kitchen layout difficult to work in?
- Are appliances outdated or inefficient?
- Is the lighting adequate for cooking and cleaning?
- Does the kitchen feel crowded when multiple people use it?
- Are the countertops, flooring or cabinets damaged?
- Do you need better accessibility or safer movement?
Next, divide your goals into three categories.
| Priority | Examples |
|---|---|
| Essential | Damaged cabinets, leaking plumbing, poor ventilation, inadequate electrical capacity |
| Functional improvements | More storage, better workflow, additional countertop space, improved lighting |
| Cosmetic upgrades | New cabinet colors, decorative backsplash, updated hardware and finishes |
This distinction helps you spend money on improvements that matter most.
For example, if your kitchen lacks storage and preparation space, replacing cabinet handles and adding decorative lighting will not solve the underlying problem.
Planning tip: Make a list of the five most important improvements you want from the renovation. Use it to evaluate every design and purchasing decision.
2. Set Your Kitchen Remodeling Budget
Your budget should be established before you begin selecting materials or signing contractor agreements.
Kitchen remodeling costs vary considerably depending on the kitchen’s size, location, existing condition, materials, appliances and amount of structural or mechanical work involved.
Start by dividing the budget into major categories.
| Budget category | What to include |
|---|---|
| Cabinets | New cabinets, doors, drawers, hardware and installation |
| Countertops | Material, fabrication, cutouts and installation |
| Appliances | Refrigerator, range, cooktop, oven, dishwasher and ventilation |
| Flooring | Materials, removal, preparation and installation |
| Backsplash | Tile, adhesive, grout and installation |
| Plumbing | Sink, faucet, pipes and plumbing labor |
| Electrical | Outlets, wiring, lighting and electrical labor |
| Lighting | Ceiling fixtures, under-cabinet lighting and task lighting |
| Labor | Contractor, carpenter, electrician, plumber and installer costs |
| Other expenses | Permits, waste removal, delivery and temporary kitchen arrangements |
Include a contingency fund
Unexpected expenses are common during renovation, particularly when demolition reveals hidden plumbing problems, damaged subfloors, outdated wiring or other concealed issues.
Set aside an additional contingency allowance rather than allocating your entire budget to planned purchases. A planning allowance of around 10–20% is commonly used, although the appropriate amount depends on the age and condition of the property and the uncertainty of the project.
Calculate your estimated renovation cost
Before requesting contractor quotes, use our Kitchen Remodel Cost Calculator to explore potential costs and build an initial budget.
Remember that an online estimate is a planning tool, not a substitute for local contractor quotations.
Budget checklist:
- Set your maximum renovation budget.
- Estimate material costs.
- Estimate contractor and installation costs.
- Include permit and delivery expenses.
- Set aside a contingency fund.
- Compare multiple written estimates.
- Track actual spending throughout the project.
3. Measure Your Existing Kitchen
Accurate measurements are essential before finalizing your kitchen layout, ordering cabinets or purchasing appliances.
Even a small measurement error can cause problems when cabinets, countertops and appliances are installed.
Measure the following:
| Measurement | What to record |
|---|---|
| Room length | Length of each kitchen wall |
| Room width | Distance between opposite walls |
| Ceiling height | Floor-to-ceiling measurement |
| Doors | Width, height and opening direction |
| Windows | Width, height and distance from corners |
| Existing cabinets | Width, depth and height |
| Appliances | Overall dimensions and door-opening space |
| Plumbing | Existing sink and water connection locations |
| Electrical | Outlet, switch and major appliance connection locations |
| Ventilation | Existing hood, duct and exhaust arrangement |
Also record obstacles such as columns, radiators, bulkheads, sloping ceilings and structural walls.
Create a basic kitchen floor plan
Draw the kitchen from above and mark the location of doors, windows, cabinets, appliances and plumbing connections.
A simple floor plan can help you compare alternative layouts before spending money on design changes.
Pay particular attention to:
- Refrigerator and oven door clearances.
- Dishwasher opening space.
- Cabinet door and drawer movement.
- Walking paths.
- Countertop preparation areas.
- Kitchen island dimensions, if applicable.
If you are unsure which arrangement will work best, use our Kitchen Layout Planner to explore different configurations.
4. Choose the Right Kitchen Layout
Your kitchen layout determines how efficiently you can prepare food, cook, clean and move around the room.
The best layout depends on the available floor space, location of doors and windows, plumbing, appliance requirements and the number of people using the kitchen.
Consider these common kitchen layouts:
One-wall kitchen
A one-wall kitchen places the cabinets, appliances and work surfaces along a single wall.
It is particularly useful in apartments, studios and compact homes where floor space is limited.
Galley kitchen
A galley kitchen has two parallel runs of cabinets and countertops.
It can provide efficient storage and work surfaces, but the aisle between the two sides needs careful planning.
L-shaped kitchen
An L-shaped layout uses two adjoining walls, leaving more open floor space.
It works well in many small and medium-sized kitchens and can accommodate a dining area or island when sufficient room is available.
U-shaped kitchen
A U-shaped kitchen uses three connected sides to create a substantial amount of cabinet and countertop space.
It is useful for households that need more preparation and storage areas, although the layout must be planned to avoid cramped movement.
Kitchen with an island
An island can provide additional preparation space, storage and seating.
However, an island should never be added simply because it looks attractive. Check the available room dimensions, appliance openings and circulation space before deciding.
Important: Do not finalize your layout based on appearance alone. A good design should make everyday activities easier.
5. Plan Kitchen Cabinets and Storage
Cabinets are among the most important decisions in a kitchen renovation because they influence the appearance, storage capacity and functionality of the entire space.
Before selecting cabinet styles, decide what you need to store.
Consider:
- Plates, bowls and glasses.
- Cooking pots and pans.
- Small kitchen appliances.
- Food and pantry supplies.
- Cleaning products.
- Cutlery and cooking utensils.
- Waste and recycling containers.
- Baking equipment.
Choose the right cabinet configuration
Common cabinet options include:
- Base cabinets for everyday cookware and kitchen equipment.
- Wall cabinets for dishes, glasses and frequently used items.
- Tall pantry cabinets for food storage.
- Drawer cabinets for utensils and smaller items.
- Corner cabinets for otherwise difficult-to-access spaces.
- Pull-out storage for spices, trays and cleaning supplies.
Check cabinet dimensions before ordering
Verify cabinet width, depth and height against your floor plan. Also check door swings, drawer extensions, appliance clearances and filler-panel requirements.
Do not assume every manufacturer uses identical cabinet dimensions.
Use our Kitchen Cabinet Calculator to help with cabinet planning.
Cabinet checklist:
- Decide on cabinet style and finish.
- Confirm base cabinet dimensions.
- Confirm wall cabinet dimensions.
- Plan pantry and tall storage.
- Select drawer and door configurations.
- Choose handles or handleless hardware.
- Check corner storage requirements.
- Confirm appliance and cabinet compatibility.
6. Select Countertops, Flooring and Backsplash Materials
Materials influence your kitchen’s appearance, maintenance requirements, durability and overall renovation cost.
Choose materials based on how you use your kitchen, how much maintenance you are comfortable with and the conditions in which they will be installed.
Kitchen countertops
Popular countertop materials include:
| Material | Advantages | Considerations |
|---|---|---|
| Quartz | Wide range of colors and relatively low maintenance | Not completely heat-proof; follow manufacturer guidance |
| Granite | Natural appearance and good durability | Porosity and sealing requirements vary |
| Marble | Distinctive natural veining | Can stain and etch more easily |
| Laminate | Budget-friendly and available in many designs | Less resistant to heat and surface damage |
| Porcelain | Thin, modern appearance and good surface resistance | Fabrication and edge details require specialist attention |
Compare material specifications, warranties, maintenance requirements and installation costs before making a decision.
Kitchen flooring
Consider:
- Porcelain or ceramic tile.
- Natural stone.
- Luxury vinyl flooring.
- Engineered wood.
- Other flooring products suitable for kitchen environments.
Check water resistance, slip characteristics, cleaning requirements and compatibility with the existing subfloor.
Backsplash
Your backsplash should complement the countertop, cabinets and overall kitchen design.
Popular choices include ceramic tile, porcelain tile, natural stone and slab backsplashes.
Before ordering, measure the backsplash area and account for outlets, switches, windows and other interruptions.
Material checklist:
- Select countertop material.
- Confirm countertop thickness and edge profile.
- Select flooring.
- Choose backsplash material.
- Compare samples under your kitchen lighting.
- Confirm product availability and lead times.
- Review installation requirements.
- Check warranties and maintenance instructions.
For countertop planning, use our Kitchen Countertop Calculator.
7. Choose Appliances, Sink and Faucets
Appliances should be selected before final cabinet dimensions are confirmed.
This is particularly important because refrigerators, ranges, ovens, dishwashers and ventilation equipment have different installation and clearance requirements.
Create an appliance list
| Appliance | What to check |
|---|---|
| Refrigerator | Width, height, depth, ventilation and door swing |
| Range or cooktop | Dimensions, fuel type and installation requirements |
| Oven | Built-in dimensions and electrical requirements |
| Dishwasher | Width, plumbing and door clearance |
| Range hood | Ventilation capacity, ducting and mounting requirements |
| Microwave | Location, dimensions and electrical requirements |
Check the manufacturer’s installation documentation rather than relying only on advertised product dimensions.
Plan the sink and faucet
Decide whether you need a single-bowl or double-bowl sink, undermount or top-mount installation, and a standard or pull-down faucet.
Also confirm the location of water connections, drainage, garbage disposal and dishwasher connections.
Important: If you are changing appliance locations, consult the relevant professionals before construction begins. Moving gas lines, water connections or electrical circuits may require specialist work and local approvals.
8. Plan Lighting, Plumbing and Electrical Work
Lighting and building services should be coordinated with your kitchen layout before cabinets and finishes are installed.
Poor planning can leave you with inconvenient outlets, dark work areas, inadequate ventilation or expensive changes during construction.
Kitchen lighting
A functional lighting plan generally combines three types:
Ambient lighting: Provides general illumination throughout the kitchen. Examples include ceiling lights and recessed fixtures.
Task lighting: Illuminates specific work areas, such as countertops, sinks and cooking surfaces. Under-cabinet lights are a common example.
Accent lighting: Adds visual interest through features such as display-cabinet lighting or decorative fixtures.
Electrical planning
Identify the electrical requirements for appliances, countertop outlets, lighting, switches and any kitchen island.
Have a qualified electrician confirm circuit capacity, outlet placement and applicable electrical requirements.
Plumbing and ventilation
Review the location of sinks, dishwashers, water lines, drainage and ventilation equipment.
If your design includes a new range hood, check the manufacturer’s specifications and local requirements for ducting and installation.
The National Kitchen & Bath Association’s planning guidelines cover kitchen equipment, electrical planning, lighting, ventilation, storage and accessibility. They are a useful reference when coordinating these decisions.
Planning checklist:
- Finalize ceiling and ambient lighting.
- Plan task lighting.
- Confirm under-cabinet lighting.
- Review outlet and switch positions.
- Confirm appliance electrical requirements.
- Check plumbing connections.
- Plan range hood and ventilation.
- Coordinate island power requirements, if applicable.
9. Research Contractors and Get Written Estimates
Choosing the right contractor can make a significant difference to the quality, cost and organization of your renovation.
Do not choose a contractor based on the lowest quote alone.
Request estimates from multiple qualified professionals and compare what each quotation includes.
Questions to ask a kitchen remodeling contractor
- How many kitchen renovation projects have you completed?
- Can you provide references from previous customers?
- Are you appropriately licensed and insured for the work?
- Who will supervise the project?
- Which parts of the work will be subcontracted?
- What is included and excluded from the estimate?
- How will unexpected expenses be handled?
- What is the estimated project schedule?
- Who is responsible for obtaining required permits?
- What warranty or workmanship guarantee is provided?
Review the written agreement
Before work begins, make sure the contract clearly identifies:
- Project scope and specifications.
- Materials and product selections.
- Labor and installation costs.
- Payment schedule.
- Estimated start and completion dates.
- Change-order procedures.
- Cleanup and waste removal responsibilities.
- Warranty and dispute procedures.
Avoid relying on verbal promises. Keep copies of estimates, receipts, product specifications, contracts and important project communications.
10. Check Permits and Local Building Requirements
Not every kitchen renovation requires a building permit. Requirements depend on your location, the type of work and the applicable local regulations.
Cosmetic changes, such as replacing cabinet hardware or painting walls, may not require permits. However, structural modifications and certain electrical, plumbing, gas or ventilation changes may require permits, inspections or licensed professionals.
Before starting construction:
- Contact your local building department.
- Explain the proposed renovation work.
- Ask which permits and inspections are required.
- Confirm whether electrical, plumbing or mechanical work needs separate approval.
- Check whether structural changes require professional drawings or engineering.
- Verify contractor licensing requirements in your area.
Do not assume your contractor’s experience in another location means the same rules apply to your property.
If you live in an older home, also ask about potential lead paint, asbestos or other hazardous materials before disturbing existing surfaces. Appropriate testing and professional handling may be necessary.
11. Finalize the Design and Order Materials
Once the layout, budget and contractor arrangements are settled, finalize your selections and coordinate material orders.
Ordering materials too late can delay construction. Ordering too early without confirming measurements can result in incorrect products or costly returns.
Before placing orders, confirm:
- Cabinet dimensions and finish.
- Countertop material, color and thickness.
- Appliance models and installation dimensions.
- Flooring quantities.
- Backsplash quantities.
- Sink and faucet specifications.
- Lighting fixtures and electrical requirements.
- Cabinet hardware and accessories.
Check product availability and delivery dates
Some custom cabinets, countertops and specialty appliances may have longer lead times than standard products.
Ask suppliers to confirm expected delivery dates and what happens if a product is delayed or discontinued.
Keep a record of product names, model numbers, quantities, prices, suppliers and warranties.
Before approving an order, compare the product specifications with your final kitchen drawings.
12. Prepare Your Home for Construction
Kitchen remodeling can disrupt everyday household routines. Preparing your home in advance makes the construction period easier to manage.
Set up a temporary kitchen
Choose an alternative area for basic food preparation.
Depending on your circumstances, you may need:
- A small refrigerator.
- A microwave or other permitted cooking appliance.
- A table or temporary countertop.
- Drinking water and basic utensils.
- A place to store nonperishable food.
- Easy access to washing facilities.
Protect nearby rooms
Dust and construction debris can travel beyond the kitchen.
Before demolition:
- Remove food and kitchen equipment.
- Pack dishes, glassware and small appliances.
- Protect nearby floors and furniture.
- Discuss dust barriers with your contractor.
- Identify safe access routes for workers.
- Make arrangements for children and pets.
- Confirm waste removal arrangements.
- Photograph existing rooms and surfaces.
Also confirm how water, electricity and cooking facilities will be affected during construction.
13. Follow the Construction and Installation Sequence
Once demolition starts, the project moves through several stages. The exact order can vary depending on the design, contractor, materials and amount of structural or mechanical work involved.
A typical renovation sequence may include:
| Stage | Work involved |
|---|---|
| 1. Protection and demolition | Protect surrounding areas and remove selected existing materials |
| 2. Structural changes | Complete approved wall, opening or framing modifications |
| 3. Rough-in work | Complete required plumbing, electrical and ventilation changes |
| 4. Inspections | Complete applicable inspections before covering concealed work |
| 5. Wall and floor preparation | Repair surfaces and prepare installation areas |
| 6. Cabinet installation | Install and level cabinets |
| 7. Countertop templating and installation | Measure, fabricate and install countertops |
| 8. Backsplash and flooring | Complete finishes according to the agreed project sequence |
| 9. Appliance installation | Install and connect appliances |
| 10. Fixtures and finishing | Install lighting, faucets, handles and finishing details |
Some projects install flooring before cabinets; others use a different sequence depending on flooring type, cabinetry design and manufacturer instructions. Confirm the correct sequence with your contractor before work begins.
Monitor the project regularly
You do not need to supervise every task personally, but you should remain involved in important decisions.
- Review progress against the agreed schedule.
- Photograph important stages.
- Check that approved materials are being installed.
- Document changes and additional costs.
- Ask questions when work differs from the drawings.
- Confirm inspections before concealed work is covered.
Avoid approving major design changes casually during construction. Even a small change can affect several connected installations.
14. Complete the Final Kitchen Inspection
Do not consider the renovation complete simply because the cabinets and appliances are installed.
Walk through the finished kitchen with your contractor and inspect each area carefully.
Cabinets and drawers
- Cabinet doors open and close properly.
- Drawers slide smoothly.
- Handles and hardware are secure.
- Cabinet doors are aligned.
- Shelves and storage accessories are installed correctly.
- No visible damage or unfinished edges remain.
Countertops and backsplash
- Countertops are properly supported.
- Seams and edges have been checked.
- Sink and cooktop cutouts are correctly finished.
- Backsplash tiles are aligned.
- Grout and sealant are complete where required.
- There are no visible cracks or installation defects.
Appliances and fixtures
- Refrigerator operates correctly.
- Oven and cooktop operate correctly.
- Dishwasher completes a test cycle.
- Range hood and ventilation operate properly.
- Sink drains without leaks.
- Faucet and water connections work correctly.
- Electrical outlets and lighting function as intended.
General finishing
- Flooring is complete and undamaged.
- Walls and paintwork are finished.
- Trim and caulking are complete.
- Waste and construction materials have been removed.
- Required inspections and approvals are documented.
- Manuals, warranties and receipts have been collected.
Create a final punch list
A punch list is a written record of incomplete tasks, defects or corrections that need to be addressed.
Photograph each issue, describe its location and agree on a completion date with the contractor.
Keep the final payment and project closeout arrangements consistent with your written contract and applicable local requirements.
Printable Kitchen Remodeling Checklist
Use this consolidated checklist to keep your renovation organized. You can print this section or copy it into your project notes.
Planning and budgeting
- Define the main reasons for remodeling.
- List essential and optional improvements.
- Establish a realistic project budget.
- Set aside a contingency allowance.
- Measure the existing kitchen.
- Create a floor plan.
- Select a kitchen layout.
Design and materials
- Finalize cabinet dimensions and storage.
- Select countertop material.
- Select flooring.
- Choose backsplash material.
- Confirm appliance dimensions.
- Select sink and faucet.
- Plan lighting and electrical locations.
- Confirm plumbing and ventilation requirements.
Contractors and preparation
- Research qualified contractors.
- Compare written estimates.
- Review the contract and payment schedule.
- Confirm required permits.
- Finalize product selections.
- Check material availability.
- Confirm delivery dates.
- Arrange a temporary kitchen.
- Protect nearby rooms and belongings.
Construction and completion
- Confirm demolition arrangements.
- Monitor rough-in work.
- Confirm applicable inspections.
- Review cabinet installation.
- Check countertop and backsplash installation.
- Test appliances and fixtures.
- Inspect cabinets, flooring and finishes.
- Create a final punch list.
- Collect warranties, manuals and receipts.
- Confirm completion of agreed work.
Kitchen Remodeling Checklist: Frequently Asked Questions
1. What should I do first when remodeling a kitchen?
Start by identifying what you want to improve. Evaluate your existing layout, storage, appliances, lighting and available space. Then establish a budget and measure the kitchen before finalizing a design or purchasing materials.
2. What is the correct order for remodeling a kitchen?
A typical kitchen renovation begins with planning and budgeting, followed by design, material selection, contractor arrangements and permits. Construction then proceeds through demolition, structural and mechanical work, inspections, cabinetry, countertops, finishes, appliance installation and final inspection. The exact sequence depends on the project.
3. What should I include in a kitchen remodeling budget?
Include cabinets, countertops, appliances, flooring, backsplash, plumbing, electrical work, lighting, labor, permits, delivery and waste removal. Also set aside a contingency allowance for unexpected expenses.
4. How long does a kitchen remodel take?
The timeline depends on the size of the kitchen, project complexity, material availability, contractor scheduling and whether structural or plumbing changes are involved. A cosmetic renovation can be much shorter than a full renovation. Ask your contractor for a project-specific schedule with clear milestones.
5. Do I need a permit to remodel my kitchen?
Not every kitchen renovation requires a permit. Requirements vary by location and the work involved. Structural changes and certain electrical, plumbing, gas and ventilation modifications may require permits or inspections. Check with your local building department before construction begins.
Final Thoughts
A kitchen renovation involves many connected decisions, and overlooking even one important detail can lead to delays, additional expenses or an inconvenient finished layout.
The best approach is to plan the project in stages: establish your priorities, set a realistic budget, measure the space, finalize the layout, select compatible materials and appliances, coordinate qualified professionals and inspect the completed work.
Use this kitchen remodeling checklist throughout the project rather than waiting until construction begins. A little preparation can make the renovation more organized and help you create a kitchen that looks good, works well and meets your household’s needs.